Share Buttons

Facebook photo butter_facebook_zpsec1f05f1.png Instagram photo butter_instagram_zps7703e522.png Pinterest photo butter_pinterest_zps6ee9dffc.png Twitter photo butter_twitter_zpsb7b92d10.png  photo butter_email_zps06377c52.png

Sunday 20 October 2013

Cinnamon Scrolls

Sugary, buttery, doughy goodness! 
Today I share my recipe for cinnamon scrolls. 
Be prepared to be addicted!
X

Dough Ingredients:
  • 7g or 1 packet of yeast
  • 1/2 cup warm water
  • 1/2 cup scalded milk (just before boiling point)
  • 1/4 cup sugar
  • 1/3 cup butter
  • 1 teaspoon salt
  • 1 egg
  • 3 1/2 to 4 cups flour
Filling ingredients:
  • 1/2 cup melted butter
  • 3/4 cup sugar
  • 2 tablespoons cinnamon
Icing Ingredients:
  • 4 tablespoons butter
  • 2 cups powdered sugar
  • 1 teaspoon vanilla extract
  • 3 to 6 tablespoons water
Directions:

Dough:
  1. In a small bowl, dissolve yeast in warm water and leave to sit. 
  2. In a large bowl mix milk, sugar, melted butter, salt and egg. 
  3. Add 2 cups of flour and mix with a fork until smooth. Then go ahead and add the yeast mixture. 
  4. Mix in remaining flour until dough is easy to handle. You might have to switch to using clean hands.
  5. Knead the dough on lightly floured surface for 5 to 10 minutes until you have a smooth ball of dough.
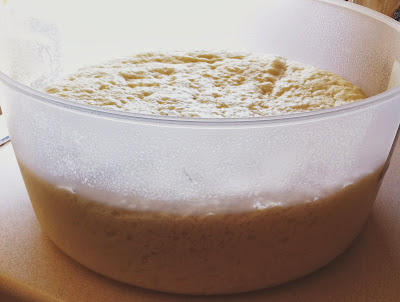
  6. Place in well-greased bowl, cover with plastic wrap and let rise until doubled in size, usually 1 to 1 1/2 hours.
Filling:
  1. When doubled in size, punch down the dough. 
  2. Roll out between two pieces of baking paper into a rectangle shape. 
  3. Melt the butter in the microwave until soft, (this makes it easier to spread) and with a pastry brush, spread the melted butter all over dough. 
  4. Sprinkle the sugar over the the buttered dough and then do the same with the cinnamon.
  5. Beginning at the top of the rectangle, role up the dough and pinch the edge together to seal. 
  6. Cut into 12 to 15 slices. at least 3-4 cm's in width.
Spray a baking dish of your choice and place the cinnamon roll slices close together in the pan.
Cover with plastic wrap and let the dough rise again until doubled in size, about 1 hour.

* Bake in a 180(fan forced) or 200 degree oven for 20-30mins, checking them for a golden colour in the last 10mins. *

Icing:
  1. Mix butter, powdered sugar, and vanilla. You might find the mixture is separating, so add 1 tablespoon of water  at a time until the glaze reaches desired consistency. Spread over slightly cooled rolls.
Go eat, share with friends and E N J O Y! 

X


Saturday 19 October 2013

Food Crawl

Last nights adventures were 10 funs! We had an absolute food crawl...We started in Hyde Park where the Good Food Festival is being held. Noodle and dumplings, ciders and beers and goodies everywhere. The lines were outrageous, but luckily went quick.
Everywhere I looked there were thousands of others enjoying food and friends.
One of the attractions were the beautiful lanterns. We stayed here posing and taking photos, while the boys photobombed anyone they could.
We then walked 20mins to satisfy Dave's lust for ice-cream and arrived at Messina Gelato in the Cross. I can't tell you I've ever had anything better! The salted caramel white chocolate and pisachio just melted in your mouth. I think I actually drank it!
We ended the night at Frankie's for Margahrita Pizza and drinks. This is a Pizza/Bar experience on its own. It has a hipstery vibe with neon lights and vintage posters/stickers stuck to every wall.
A night spent well with the best of friends. X

PS. Need to get a new camera...my phone camera sux!


Friday 18 October 2013

Pasta Maker


Yesterday I made pasta for the first time. Some dear friends had given me a pasta machine for my birthday in May and I hadn't yet found the chance to use it. So yesterday I whipped the box open and worked it like an Italian nonna.
After reading Jamie Oliver's fresh egg pasta recipe, I thought to myself, ok yeah that sounds simple, I can do that...boy was I wrong! 
My first mistake was that instead of using a bowl to make the dough, I tried to be all fancy and just make a flour well on the kitchen counter like he does. Big mistake, I found myself running after rivers of egg mixture all over the counter top haha! I finally got the mixture together and didn't realize what a workout kneading the dough is!!!! My fadoopadoopers are sore this morning!
My second mistake was not having enough room on my kitchen counter. I didn't realize how long the pasta stretched out through the machine, so I found myself looking like a mummy with all this pasta wrapped around my arms!
Having a new machine, I also spent a lot of time cleaning out the factory grease and grime with a spare ball of pasta dough. This took so long!!!
Lastly, I think I made the pasta too thin. After it had dried on the rack, taking it off was a nightmare. It kept crumbling and I had so much pasta on the floor rather than the rack!
Although I had some disasters, I would do it again. Now that I know what i'm doing, I could probably do it quicker.
The taste and freshness of homemade pasta was amazing. It just melted in our mouths! 
I served the pasta in a creamy pesto chicken sauce and it was devoured in under 10minutes! 

X


Wednesday 16 October 2013

Thrift Gem!

So today in between students, I decided to check out an op shop that had recently had some renovations. I thought, I won't get anything...I'll just have a peep hehe!
I'm so grateful I did because I found this little gem!
I had actually tried this dress on in Forever New earlier in the year. The price was well over $100. Today I feel blessed that I only paid $15! Nothing is wrong with it either. I couldn't believe it! It fit me perfectly. Not too big and not too small.
I think I just smiled to myself for 10mins in the change rooms haha!
Can't wait to take this baby out for a spin. Thankyou Lord!
X


Tuesday 15 October 2013

Brown Wrapping Paper Craft

I love brown wrapping paper! I mostly use it to wrap presents, make menus for dinner parties and photobooth backdrops for parties. 

Menus:

Instead of printing a menu for each guest, I like to make one huge one and stick it to a wall.
All I do is roll out the length I want to use and start drawing. I like to stamp on the menu and then sharpie on headings and other designs. 

Photo Booths:

These are a fun way to take pictures with friends and families and nearly everyone has a camera phone, so getting someone to take pictures is never a problem. All you need is a roll of brown wrapping paper, which you can find this at a dollar store. Just pencil on a design and then fill in with a black marker.

Here are some links to props I've used. All you need to do is go ahead and print them on card, cut out and glue them to sticks. Easy!

Photobooth Printables

***

I find most of my inspiration from using the Rhonna Designs app. I find the designs simple and easy to draw out in a larger scale. If you have an iPhone you can find this in the app store. If you go to the website, you can also purchase design packs, digital kits, fonts and printables. I'm in looove!

X